Monday, June 23, 2014

Kodak TMAX Developer Update

There was a rumor floating around online about the possible demise of TMAX Developer.   Turns out Kodak did discontinue the product that made a 1 gallon working solution at 1:4.

Kodak replaced the product that made 1 gallon with a 1 liter concentrate to make 5 liters at 1:4.  For anyone that used this developer in the past knows that Kodak publication J-86 provided all the details about mixing, storing and using this developer.  On page 9 of that publication was a capacity chart that showed the total number of rolls you can process with 1 gallon.  That total is 48 rolls of 36 exposure 35mm or 120 film without replenishment.  You simply followed the recommended time for rolls 1 to 16 then added one minute for rolls 17 to 32 and two minutes for the remained 33 to 48 rolls.  This allowed you to put the spent developer back in with the working solution and simply keep reusing it until the 48 roll capacity was exhausted.

Kodak has not since updated the publication to replace the 1 gallon concentrate with the 1 liter.  I did some quick math and put together my own chart for the newly packaged 1 liter concentrate when mixed with 4 liters of water to give you a 5 liter working solution.  

The formula:  128 oz. per gallon.  48 rolls per gallon.  Divide these two and you get 2.8 rolls per oz.  5 liters translates to 169 oz.  169 divided by 2.8 rolls = 60 rolls per 5 liter mix.  Simply divide this by 3 to get the range.

1 to 20 rolls:  normal development time
21 to 40 rolls:  normal development time +1 minute
41 to 60 rolls:  normal development time + 2 minutes

The 1 liter concentrate sells for approximately $20.  This averages $3 per roll developed.


Monday, April 14, 2014

35mm Motion Picture Film in Still Cameras? Using Exotic Film Emulsions Part 1

As the first part of my shooting exotic film series,  I want to talk about my adventures with shooting 35mm motion picture film. It is gaining a following with film shooters.  I stumbled across this idea several months back and decided to dig a little deeper and find out what the buzz is all about.

Having a wide variety of film types to choose from in the year 2014 has become a let down.  Thinking back 10, even 15 years ago, there was a  multitude of film flavors.  Before digital, photographers had to choose a film type geared toward the subject matter simply because film scanning and editing in photoshop wasn't an option.  There were of course color negative, color slide and B&W negative films of many varieties.  Film was available to accentuate or even create subtle saturation, grain, and contrast.  There were films available for skin tones, wedding dresses, vibrant colors, low light, course grain, high sharpness and vivid colors.

Taking a look at what's available to today, there are amateur films and professional films. The main difference being that amateur film has a longer shelf life, designed to sit on the drug store shelf for months or in a warehouse of unknown temperature with little affect on the color balance.  Professional films are often stored in a refrigerator and peak sooner (expire sooner) and aren't meant to be kept in a warehouse.  The price often reflects this difference.

Kodak made film specifically for skin and portraits for many years.  VPS 160, VPH, Pro 400MC and PMZ 1000 were the predecessors of the new Portra series.  On the amateur side, there was the standard Gold series, Royal Gold, Select Series, Max series, and so on.  The speeds ranged from 100-800 and reflected various color saturation and grain levels.  For B&W shooters there was Panatomic-X (ASA 32), Technical Pan, and of course Plus-X pan, all of which are extinct now.  Fuji offered Reala, Velvia, NPS, NPH 400, and Astia 100 transparency film, just to name a few.

Today, Kodak has a Max 400, Portra 160, 400 and 800. Ektar 100, Ektachrome 100 and Fuji offers Pro 400H, and 400 speed amateur color negative film just to name a few.

Since the variety of film is dwindling, film shooters are looking towards other types of film. Kodak makes a variety of motion picture films, all of which can be used in still cameras. Motion picture film by Kodak falls in the "Vision" series.

Vision film is available in 8mm, 16mm and 35mm.  There has been three versions of the film, starting with version 1, or Vision, then Vision 2 and now at Vision 3.  These are color negative film stocks that are used as originals, shot in the movie camera that will be processed and then later used to create the positive image used to project in movie theaters.  The options are 50D, 200T, 250D, and 500T respectively.

The D refers to daylight balanced, around 5500 kelvin, or standard daylight.  The T is for tungsten, around 3400 kelvin and will provide a natural look in tungsten balanced lighting.  Most of the these film types are available on eBay.  Sometimes they are sold as recans, or film left over from a movie or commercial that didn't get used.  It will have an approximate length left written or taped on the outside of the can.  The film is available brand new in 400 foot and 1000 foot lengths.  Vision 3 is the newest generation that provides outstanding color balance and tonality.

Check out the specs here:  Kodak Vision 3 series.

Kodak offers a B&W motion picture film which is extraordinary.  It is referred to as Eastman 5222 Double-X.  You can get the skinny here.  Double-X

Sometimes you can find folks on eBay that have bought a 400' spool and cut the film into 24 or 36 exposure lengths and spooled it onto standard 35mm cassettes.

I received a 400' reel of Vision 2 500T as a gift this past Christmas. I have spooled a few rolls in the darkroom and shot it, playing with filtration and ASA settings attempting to find a sweet spot.

When shooting a tungsten based film in daylight, a filter is required to correct the color balance as tungsten film is blue/cyan based to offset the yellow/red color of tungsten lamps.   When shooting in daylight or with electronic flash, the T series Vision films require a #85 filter, which is yellow.  No filter is necessary under tungsten lighting.  The film is exposed at ASA 500 in tungsten and ASA 250 in daylight with a #85 filter.

Double-X film is generally exposed at ASA 200 and can be processed at home in standard developers such as D-76.

Vision color film is a different animal and may not be for everyone. Here's the scoop.

Vision caveat #1:  The remjet backing.  The rem-jet is a black carbon type layer on the base side of the film and is used as an antihalation type backing. The black color prevents light from passing through the film and then bouncing back through the base twice, causing halos on the highlights.  This layer must be removed during the processing stage.  There are folks that choose to remove it first, others remove it last.  In a commercially processing lab, the rem-jet is removed first, using a special jets of alkaline water.   I choose to remove it last and I will explain this in detail in the processing section below.

Vision caveat #2:  Vision color negative films are not commerically/professionally processed in C-41 chemicals and cannot be processed in drug store, big box photo labs as long as the rem-jet is still on the film. Color motion picture film is processed commercially as ECN-2 or Eastman Color Negative processing. The main difference is in the developer stage itself.  Kodak provides the formula for the developer and remjet removal chemical formula as a PDF file download from their website.  The developing agent used in C-41 color negative processing is CD-4, while the agent used in ECN-2 is CD-3.  I understand the C-41 developing agent does not react with the color dye couplers in the exact same way as it is intended to in ECN-2 developing.  That withstanding, you can process Vision film in C-41 at home with great results.

If you are interested in mixing your own ECN-2 developer for your darkroom, use the link above to download the formula for the first developer.  The only company I know of online that sells CD-3 is Artcraft Chemicals. You can also buy through their eBay store.   It's about $28 for 100g with 4g used per Liter of developer made, so about 25 liters worth of CD-3 for that price.  Not bad!!

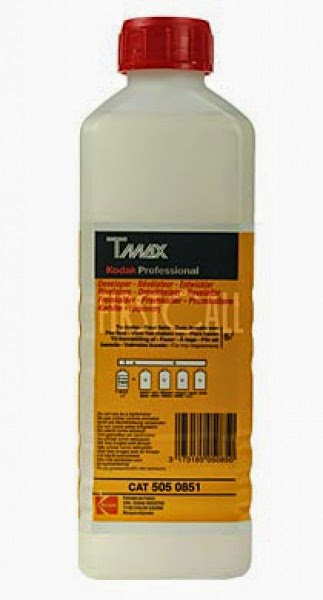
If you want to go the C-41 route, you can purchase the kits from B&H and Freestyle. The kits are powder or liquid and will make 1 or 2 liters. I have been able to process about 30 rolls with a 2 liter kit.

If using the C-41 kit, here is the process:

Water bath:  106 degrees F.  1 min
Developer :  106 degrees F   3 min
Blix              106 degrees F   7 min
wash            106                   2 min
remjet removal:  106 degrees  2 min
final rinse and then photoflo or wetting agent of choice

Remjet Removal for home user:   

Starting with 500ml water add 1 tablespoon baking soda (sodium bicarbonate) or washing soda (sodium carbonate).
I have had success with both.  Soak film for 2 minutes, then remove film from reel and use soft sponge or fingers to remove backing from base side. You will see it on the film and will likely see it some on the plastic or stainless steel reel.

Very Important!  If you shooting Kodak Vision film, do not attempt to take it to a traditional photolab, drug store lab or big box store for processing!  Many photographers will reuse old 35mm Kodak and Fuji film cassettes to bulk load the film. These cassettes have the "process C-41" indication on the cassette. A lab technician will process the film in the C-41 machine as such and it will destroy the chemicals.  Here is the explanation:  Even though the chemicals are the same variety in home processing kits as those found in automated machinery, the home enthusiast will use plastic and stainless steel reels to load the film onto.  The film itself (the edges) only touches the reel. The remjet surface never makes contact with anything but the tinest edge of the reel.  In a C-41 automated machine (not dip and dunk) the film passes through squeegees, rollers and other surfaces that come into contact with the remjet.  The carbon backing will come off in the machine as the film passes from tank to tank and will leave the remjet floating in the tank. This will attach itself to other rolls of film and will gunk up everything.  If you process Vision film with standard C-41 process film at home, you will likely get remjet on the other rolls as well. Process Vision film by itself.  

Here is an example of Vision 3 500T processed in C-41 chemicals.  Scanned and color corrected in photoshop. 


Eastman 5222 Double-X processed in D-76 stock


Kodak Vision 2 500T processed in C-41 Chemicals: ASA 200


Friday, April 4, 2014

Quality Control in the Darkroom & Lab

Quality control or QC as it's often called is the basic set of developing practices and standards set forth to achieve consistent and accurate film and print processing.  I'll start off discussing these standards for color negative and color paper processing as the variables are not designed to be shifted as they would in traditional B&W processes.

There are 4 factors that go into achieve accurate developing of film and paper. Whether or not your are developing your film at home in a tank or you are using/operating a C-41 film developing machine such as those from Fuji or Noritsu, the concepts are the same.
  • time
  • temperature
  • agitation
  • concentration (dilution or strength of the chemicals)

As in all processes (C-41, B&W, RA-4 and E-6) the developer itself is the most critical in terms of applying these four principles.

All of the processes include a developer step. B&W has a stop to arrest the development, then a fixer to remove the remaining silver and clear the film.  Color negative (C-41) and color paper (RA-4) have either a separate bleach and fix or a combined Blix step. These two steps convert the silver metal reduced in the developer back to a silver solution that is soluble and removable, leaving only a dye image behind and no silver.

E-6 has a separate color developer where the dyes are formed, a reversal to make the negative image positive, and then a bleach/fix step.

For color negative processing, the developer time is specifically 3:15 or 3:30 depending upon the temperature.  In a tightly controlled process, that temperature is 100 degrees F.  A variance of +/- .25F can affect the color balance of the film. You can use the developer at 102 and 104 degrees F and adjust the time accordingly. I use a kitchen stove and a pot of water to create a warm bath.  Once the chemicals are in the 100 degree range, they are ready to go.  Film processing machines use heaters, similar to aquarium heaters, submerged in the tanks of chemicals. These heaters maintain the perfect temperature throughout the process.

The agitation factor comes in the form of the developing tank being inverted during the developing cycle. This allows fresh developer to come into contact with the emulsion of the film to act on the silver halide to reduce it to silver metal. If there were no agitation and the film were to sit in the developer, the developer itself would exhaust at the location point on the emulsion where it does its magic.  Typically, in a developing tank scenario, you would invert the tank about 3 times every 30 seconds or 10 times every 60 seconds.

In the case of automated machine processing, the agitation comes in two forms.

1: the movement of the film through the chemicals. The film is typically taped to a plastic card. The center of the card is outfitted with gear holes, similar to sprocket holes. The card is inserted into the machine and contained in each tank of chemicals is rack containing gears and rollers. These gears grab the card and pull the film through the tanks and through each chemical step. The movement of the film through the tanks allows fresh chemicals to come into contact with the film.  This movement action coincides with the time factor. The tanks are a certain depth and the racks are a certain depth inside the tank. As the drive motor moves the gears which in turn pull the card with the film attached, the film enters and exists the tank for exactly 3:15. The time in which the film is developed is not adjustable. The motor only operates at one speed.

2:  Circulation.  In order to keep the chemicals from becoming exhausted, a pump is used to move the chemicals from the top of the tank, through a filter and down to the bottom of the tank and back up again.

Finally, concentration is the last factor in quality control.  The dilution of the developer along with each chemical in the processing steps.  Most home developing kits for color are prepackaged as powders. Some are in liquid form. These are then diluted in water to make a final "working" solution ready to use for developing.  In the case of C-41 processing, once the chemicals are mixed, there is no further diluting as is an option in B&W developing. C-41 is a fixed process.  Most photo labs purchase the chemicals for film developing in pre-mixed containers.  Some have on-board mixing, where you add the developers directly to a tank on the machine and then the machine adds water. This eliminates user error in mixing.

As you can see, if any of the above 4 factors are altered, you can get inconsistent results.  Too much or too little agitation, time, too low or too high temperatures and finally, too strong or too weak chemicals will either over or underdevelop the film.

So, how do you keep track of these factors and maintain QC?  For the photographer that processes film at home, the simplest way is to keep very good notes.  If you mix the chemicals properly, you can eliminate concentration as variable.  The time you develop the film is critical.  Keep your timing accurate between steps.  A good thermometer will provide you with the proper temperature.  Finally, following a consistent agitation scheme to keep fresh chemicals in contact with the film.  Take notes on each roll of film you develop that include data for time, temperatures and total rolls developed.  Your agitation and concentration* should not alter.  For the home darkroom user, the time and temperatures will be the biggest factor in getting good results.

In the photo lab industry, there is a much more technical way to keep up with QC.  A small strip of film called a control strip is used.  The control strip is pre-exposed by Kodak or Fuji and contains certain patches of exposure. The control strip is developed and then the developed film containing the patches is read by a machine called a densitometer.  This passes light through the film and onto a light sensitive optical eye. The densitometer then calculates the amount or Red, Green and Blue light that is recorded as the light passes through those individual and different density patches.  These RGB values are converted to a number. This number is then plotted on a graph.  The graph contains upper and lower limits.  After the values are plotted, the operator can look at the lines and determine if the control strip has been developed properly within the designed limits.  The RGB lines in the graph can converge, split, raise or lower depending upon one or more of the above 4 processing factors.  An experienced QC technician can determine which one or more of the 4 factors are contributing to an incorrect processing of the film.  Each one of the patches on the control strip has an identification such as LD, HD, etc that is used to form a corresponding RGB plot line on the graph as seen below.


The home darkroom user would likely not go to the expense and training necessary to purchase control strips from Kodak of Fuji (and they aren't cheap!) along with a densitometer (also, not cheap!) to maintain tight QC.  Simply keeping good notes will help you maintain good developing habits at home.

* now for the caveat.  When developing film at home the developer solution will with time and usage begin to exhaust.  Developers are active solutions that are sensitive to light and oxygen, both will kill a developer over time. In addition, the more a developer is used the more silver it reduces to metal during development. Eventually, after X number of rolls processed, it can no longer reduce silver effectively. As this happens, the quality of the development decreases. In the home darkroom, you will need to alter one of the 4 factors to continue getting acceptable results until the results are no longer desirable.  Usually, you will simply add more time to the development, which is what I do when processing color film at home.  Once I add more than 1 minute additional time, or total about 30 rolls developed per 2-Liter mix, I discard the chemicals.  The photo lab does not have the same issue as the machines automatically add fresh chemicals to the working tanks at certain volume intervals, keeping concentration consistent.

There are several more incidental factors that occur downstream to achieving good QC.  These include the concentration of the bleach and fixer, aeration of the bleach along with the time steps for each of these chemicals and so forth that are too detailed for explanation on this blog and really only apply to photo labs and not the home darkroom user.  But because the developer itself is so critical, I concentrated on this step for basic educational purposes.


Sunday, March 30, 2014

Adventures in Large Format - The Press Camera: Crown Graphic


It took about 25 years of dabbling in photography before I decided to plunge into large format.  I knew the image quality was spectacular but shooting 4x5 had some gnawing issues that I really wasn't ready to tackle until now.


  1. loading individual sheets into a film holder
  2. only 2 shots per holder
  3. focusing on the ground glass with my less than stellar vision for a 40 year old
  4. tilt, swing, shift and the other one....
  5. developing 4x5 sheet film
  6. scanning the film without breaking the bank on an Epson V750
This 1963 Crown Graphic came across my plate and I was a hooked and just had to have it.  Maggie had to show me how to use the basic controls because I had literally never touched one in my career.  


It didn't take long to realize shooting with large format is truly slow photography.  A tripod is really essential. There is the opening and setup of the camera.  Opening and then locking the shutter open so you can see the image on the ground glass.  The image is upside down so there is a learning curve on composition. 

Focusing is a big challenge for me as a bifocal wearer.  I have since taken the rear barndoor hood off the camera and started using a loupe to focus by holding it flush to the ground glass.  This has improved sharpness considerably for me. A dark cloth or jacket is also essential to use as a focusing aid to keep stray light from hitting the glass.

All the tripod controls must be locked down tight as one slight movement in the camera will shift the focus.  

This camera has front tilt and swing. It also had front rise. Some nice effects can be had by experimenting with the lensboard shifting.  The film plate does not have any control on this camera, only the lensboard.

One of the first issues I encountered was a consistent underexposure with all of sheets.  I could not figure out why.  I was attempting a lot of close up work at first because this camera can do really nice close ups as the bellows will extend all the way out to the edge of the rail.  After much head scratching I started picking up large format books looking for an explanation.  I soon found it and then wanted to beat myself for not realizing it sooner. 

Bellows Extension Compensation:  Because the bellows extends out this increases the distance light must travel from the the lens opening through the bellows and onto the film plane.   There are a couple of ways to overcome this mathematical conundrum and get the correct exposure.  You must calculate the distance from the lens to film plane, squared (not kidding, really) and divide it by focal length of the lens, squared. This will give you the compensation factor which then must me converted to an exposure value.  

Here is an easy way, if you can find one of these tools. Calumet made a bellows compensation tool for the field. The square chip is placed in the scene. The exposure strip is placed on the ground glass.  Using the instructions below you can quickly determine the amount of exposure to add without a lot of math.


Even better, maybe not as fun, if you have an iPhone or iPod touch, you can download the Pinhole Assist app for about $3. This app includes a bellows compensation tool that does all the math for you giving you the
exact shutter speed to use with any aperture.  It's mainly designed for pinhole photography but the included bellows factor makes it worth the price. 


Saturday, March 29, 2014

Mixing your own: Kodak D-23 Film Developer

Kodak D-23 hasn't been available commercially for years.  Using only two ingredients it is a great compensating B&W film developer with highlight holding ability.  It's super easy to mix this developer yourself.

You'll need:  sodium sulfite and metol.  Both are available online from Adorama or from Photo Formulary.

Start with 750 ml of water at 125 degrees

add 7.5 grams of Metol.  Mix well
add 100 grams of sodium sulfite and mix until dissolved.
add enough water to make 1 liter.

You can find times for many popular film types at the Massive Development Chart

D-23 can be used as a stock solution for 1:1 for one shot use economy and a slightly sharper negative.


Here is an example of Fuji Acros 100 shot with a Yashica 124.  Exposure was 1/4 @ f22.
Developed in D-23 stock solution.


Everything You Ever Wanted to Know about APS (Advanced Photo System) but Were REALLY Afraid to Ask!

The Advanced Photo System, or APS, could have been big. But digital happened.  Introduced around 1995, APS or IX240 was slow to take off and confusing at best for photographers.  Available as color negative and C-41 chromogenic B&W film, it was designed to be a simpler, fail proof way to get better photos.  The film could be rewound in mid roll and exchanged for higher speed or even swap color for B&W.

But, questions started to come up:

  • where's the film?
  • why are there 3 formats? 
  • 4x7?
  • why can't I see the negatives?
  • how do I order reprints?
  • can I order a 4x6 even if I shot it as panoramic?......and so on.

The concept was new:  The film is kept inside the cartridge before and after processing. This helps minimize handling and scratches.  An index print is included with processing so it's easy to identify the images by frame number. Each roll comes with a unique 6 digit ID number imprinted on the cartridge, film and index print to keep everything organized. 

APS cameras can shoot three different formats:  Classic or 4x6, HD or 4x7 and Panoramic, 4x12.  The problem with the formatting  is that 4x7 is full frame.  In order to include all of the image, side to side, including everyone in tight group shots or landscapes it necessitated printing a 4x7.

Obstacle #1: no one had 4x7 frames and photo albums.  4x6's were cropped and this confused the photographer on why everything couldn't be printing in the 4x6 ratio, which is full frame on 35mm film, and what most people were used to.

Even though the camera exposed every image full frame, 4x6's and 4x12 shots were simply cropped by the minilab printer at the photo lab.  The camera could be switched to any format at anytime. The viewfinder also changed and the camera encoded the film with exposed "tabs" (as seen by green tabs at edge of film in above image) that were read optically by the negative carrier on the printer to automatically print the size selected at the time of the shot.  

Obstacle #2:  images were shot on panoramic by accident; this prompted the photo lab to print 25 panoramic frames at $1.00 + per print when it was not intended.  A reprint of 25 frames in either 4x7 or 4x6 was then requested, wasting time, money, chemicals and paper. 

Obstacle #3:  After processing, the index print was misplaced confusing the photographer on whether or not the film was a new roll or already processed.  A new index print had to be made in order to request reprints and to identify the frames on that roll of film.

Obstacle #4:  Photo labs were required to upgrade their existing equipment (at a considerable cost) to be able to process and print APS. Why?  The film has to be removed from the cartridge before processing. In order to do this a dettacher device spins the film out of the cassette (in a dark box) and transfers it to another light tight plastic cartridge that is compatible with current C-41 film processing machines. These machines have sensors to read the width of the film which then calculates the appropriate amount of chemical replenisher to add to the tanks based on the size of the film being developed. In contrast, 35mm film is taped to its inner spool in commercially manufactured cassettes and the processing machine cuts the film when it reaches the end as it is pulled from the cassette into the chemical tanks of the machine.  If APS film were not transferred, it would be cut by the machine (not really possible, but this is part of the explanation) and it would not be in a position to be reloaded back into the original cartridge.  After processing, a reattacher puts the developed film back into the original cartridge.  During the subsequent printing phase of the processing,  the film is not removed from the cartridge but rather the negative carrier opens the door and spins the film out of the opening and the prints each frame before reversing it back inside again.  The plastic cartridge used to hold the film for loading into the processing machine is designed with a sticky spool. The APS film would stick to the spool, like a fly to flytrap paper, and the spool would rotate and wind the film up. This spool had to be regularly cleaned with denatured alcohol to eliminate the grime that would adhere to the sticky spool. If left dirty, the film would lose its grip on the sticky spool and just sit there while the spool rotated and the dettacher machine would scream with error sounds alerting you to a load failure. This required a trip to the darkroom to open the unit in the dark, remove all parts, spin the film back into it's own cassette and then clean the transfer cartridge and start over again. FAIL.

Obstacle #5:  Photo labs did not and do not train the lab technician on proper developing and handling procedures for APS film.  I have seen many a roll of APS processed by drug store photo labs that had leader card tape on the head of the film because they didn't detach it first.  FAIL.  If the head or tail of APS film is mangled or damaged, it will not reattach to the cartridge nor will the minilab negative carrier be able to pull the film out.  This would always lead to jamming.  Fuji and Noritsu manufactured reshaping devices to reshape the head and tail of the film (they are different designs and shapes).  This, however, caused additional problems on some minilabs because if the film does not measure the correct length as it is being pulled out of the cassette and exposed or scanned, the printer would jam with errors on film length inaccuracies.  Groan.

Obstacle #6: APS film is 24mm, not 35mm.   This minute size lead to more grain and softer images due to the amount of enlarging required to print the images as 4x6 snapshot size and 5x7 or even 8x10 enlargements. 


Position 1:  New Roll, unexposed, ready to load into camera
Position 2:  Partially exposed.  Can be reloaded and shooting continued
Position 3:  Film exposed, ready for developing
Position 4:  Film Processed

Obstacle #7:   The spool of the cartridge can be rotated at any time with a screwdriver or small tool to push the film out and in doing so the numeric indicator changes with the rotation. If the spool was rotated to position 3 by mistake, one would assume the film had not been processed. Again, I saw many rolls of APS come into the photo lab for processing that had already been developed with the customer adamant that it hadn't.  How can you tell?  The small plastic tab between #2 and #3 positions at the edge of the cartridge. At the time the film is detached, the detaching device punctures that plastic tab, pushing it inward. The above cartridge has been processed as the tab has been pushed in.   

APS film has not been manufactured in some time. You can, however, find batches of expired film in drug stores and camera stores.  Proceed with caution.  I wouldn't shoot anything on APS film that might be important.  Now go have some fun!

If you can find an APS camera.  And it loads the film. And it doesn't jam mid roll.  Groan...


Thursday, March 27, 2014

Caffenol: The coolest B&W film developer you're not using

Caffenol:  def.  using instant coffee crystals along with other household items as a B&W film developer.

I am all for sticking it to the man.  Well at least when it comes to paying good money to large name brand companies for expensive film developers.  Caffenol is a concoction of instant coffee, vitamin C and washing soda.  All of these items can be bought at stores other than camera and photo shops, usually at a grocery store or big box store.

Not only does instant coffee work as a B&W film developer, it works amazingly well.  I have shot many rolls of film and tested out Caffenol developer mixtures and I have come up with a formula combination that I believe rivals any commercially available film developer.  Caffenol is extremely compensating. The highlight development exhausts while shadow development continues giving a nice full range of tonal values.  The negatives are sharp and have a slight stain.

There is a lot of information about Caffenol online. I will provide the details of my recipe and workflow.  The results are simply stunning!  Here is the ingredient list:
  • Instant coffee ( I have used Trader Joes, Folgers and most grocery store brands)
  • Vitamin C (ascorbic acid) powder
  • Washing Soda (Arm and Hammer) in the laundry detergent aisle.  It's in a big yellow box
  • Potassium Bromide (not required, but certainly nice to have)

After I realized that Caffenol works, I had to know why.  I had to know the science behind it.  Here it is.

Washing soda is really sodium carbonate.  This is actually a common component of many film developers. This is know as the accelerator or alkali, as it provides an alkaline environment conducive to the silver reduction process.  Other accelerators used in commerical film developers are sodium hydroxide (red devil lye) and Borax (yep, 20 Mule Team Borax also available in most grocery stores)

The developing agent is a combination of caffeic acid from the Instant coffee and the Vitamin C. These two combined create a super-additive chemical that reduces the silver halide in the film to silver metal.  Other common developing agents used in commerical film developers are Metol, Phenidone, and Hydroquinone, none of which are available in your local grocery store!

I purchase Vitamin C from ebay.  You can find many suppliers of powdered Vitamin C.  I purchased 250 grams for around $8.50 including shipping.  Only 5 grams of Vitamin C is used per batch of Caffenol.

Finally, potassium bromide.  This is an optional ingredient, and one you won't find in the grocery.  I purchase it online from Photo Formulary, available through Adorama.

Potassium bromide is a restrainer.  This holds back overall development.  The reason I use this?  My Caffenol workflow development is for a 60 minute semi-stand development (more on this in a bit) and the longer the film is "exposed" to the developer the greater the possibility of chemical fogging.  In other words, silver grains not exposed in the camera will darken from prolonged exposure to developing agents creating a fog or dark haze on the film.  Potassium bromide will reduce the fog by holding back development. This also will tend to increase the contrast a tad as the shadows in the film will show less development than the highlights.  The potassium bromide is used sparingly, only about 2.5mm per roll of film.  I buy it in crystal form and weight 20 grams on a digital scale and dissolve it in 200 milliliters on warm water.  10 milliliters of this solution will equal 1 gram of potassium bromide.

I purchased an inexpensive digital scale from ebay.  I use coffee filters to measure out the ingredients.

I start with 400 ml of water at 68 degrees

add:  8 grams of washing soda.  dissolve completely
add:  5 grams of Vitamin C.  dissolve and wait for bubbles to form on the bottom of mixing vessel.  Stir until bubbles disappear.
add:  20 grams of  instant coffee.  mix well and let stand for 5 minutes to settle.
add:  2.5ml of potassium bromide (if using and not required)
add water to make 500 ml total.

Develop your film normally for 60 minutes in Caffenol.  Using a semi-stand development technique you will agitate the film continuously for 1 minute and then again for 10 seconds at the 2. 4, 8, 16, and 32 minute marks. The remainder of the time the film will sit untouched until the 60 minute time is up. Discard the Caffenol as it is a one-time use developer. Do not reuse.

Stop the development using running water only. Do not use an acid stop bath.  Acid stop when used with a developer containing sodium carbonate (washing soda) can cause carbon dioxide gas to release which can cause blistering on the film)  Rinse film for 30 seconds in running water at 68 degrees

Fix the film normally and then wash and photo flo normally as well.

I found the semi-stand agitation and recipe work well with Kodak TMAX 400 generation 2 and Fuji Acros 100.

I shot several test frames of a Macbeth Color Checker at several ASA settings to see which setting would give me the best exposure with Caffenol.  This test revealed Kodak Tri-X 400 was best exposed at 400.


This is Kodak TMY-2:  TMAX 400 Generation 2 processed for 60 minutes using above recipe


This is Eastman 5222 Double-X cinema film exposed at ASA 200 and processed in Caffenol


Hybrid Workflow

While I do not shoot digital images these days, I do scan negatives and prints.  I believe most film photographers follow a hybrid workflow.  That is, shoot film, then digitize the film images for editing, sharing and printing.

Let's face it, optical printing from a photolab is a thing of the past.  Optical printing is where the minilab printer will feed in the negative and then expose the paper from a light source passing through the negative, then a lens will focus in on the paper.  The paper is then processed in standard RA-4 color paper chemicals and dried.  This was the minilab standard for 20 years.  Because these printers will not accept any digital formats, nearly all photolabs have replaced them with digital printers that scan the negative, or input the image from CD's and memory cards and more likely from internet servers.  The printers, such as the Fuji Frontier and the Noritsu series digital printers convert the images and output them to lasers which are then used to expose the traditional silver based RA-4 paper.

This method really has many advantages.  Dust is nearly eliminated with Digital Ice technology. Color correction is more accurate and images can be sharpened.  All of these features are unavailable on traditional optical printers. I printed color negatives for many years using mainly Noritsu and Fuji optical and digital printers.  Trust me when I say there is nothing as beautiful as an optical print made from a properly exposed and properly developed color negative.  Eliminating dust is near impossible without chemical film cleaners and compressed air.  The printer must be kept in top color balance and each film type programmed in by bar code and then color balanced for normal, under and over exposed negatives using a control negative.   The control print is processed in the printer and then is read on a colorimeter and those numbers will correlate with a color balance.  I used a control negative, called Nora, for many years.  This included a mannequin for skin tone reference and color patches as well as an 18% gray patch in the center for neutral reference.

My typical workflow today consists of shooting film and developing it at home.  That includes B&W and color, 110 up to 4x5.  I do not process E-6 slide film.  It has been many years.  The chemicals are fairly expensive and the low utilization (not much volume to process based on chemical quantity) will allow the efficacy of the developer to dwindle quickly.  After the film is processed, it is scanned on an Epson V500 with digital ice to remove dust.  Minimal color is corrected.  I will then take the images into photoshop for final color, density, contrast and cropping before sending to a professional lab for digital printing on traditional silver based Fuji crystal archive paper.


Pinhole Assist App - A Must Have

Even though the content of this blog revolves around film I am certainly not opposed to some digital technology when it comes down to complicated math.  I dabble with pinhole photography because its fun and doesn't require me to spend time with shutters and apertures.  However, doing the math required and finding a light meter that has an f-stop range above the 200's is near impossible.  Some will say it takes the fun out of pinhole, but I come from a generation of photo education where I find it more fun to nail my exposure than just shooting from the hip.

The Pinhole Assist app for Apple products came to my rescue.  This is absolute jewel of a tool.  Not only does it have the "canned" apertures for specific pinhole products it gives you the ability to pick the exact aperture for your pinhole.  Not sure what that is?  Even better, this app allows you put in the diameter of the aperture along with approximate millimeter of the "lens" (field of view) and it will calculate it for you.

A small image appears on the app screen of the "zone" you a metering, courtesy of the front camera.  In addition, you can save the image along with all the numerical data and email it to yourself as a reference so you can compare it to the processed film image.

But, there's more!  The app includes an algorithm to calculate the reciprocity error factor when exposing for more than 1 second, which is almost always likely with pinhole cameras.  You can save all your data and profiles for future use and retrieve that data the next time you're in the field without having to program in the aperture, film type, etc.

Have a view camera?  This app goes another step further by providing you with the additional exposure required for bellows compensation.  This is the additional amount of exposure required beyond the light reflective reading that is necessary when the bellows on the camera gets extended out for close up work.  Fire up the app, click on the bellows compensation icon and you "touch and drag" the slider and the bellows expands or contracts as the distance between lens and film plane gets calculated in millimeters or inches.  You can estimate this visually or take along a ruler for more precise numbers.  This app then calculates the additional exposure required.  For view camera users alone, the bellows compensation feature is worth the price of the app.


Monday, March 24, 2014

Film Developing - Pre-soak?

I am often asked if I pre-soak my film before the developer step. Here are my thoughts:

The idea is that putting your loaded reel of film in a water soak before the developing stage improves the quality of developing, by eliminating a couple of possible problems.  The pre-soak is mainly used when developing film with a less than 5 minute developer time.  Less than 5 minutes in the developer step, the film can experience a uniformity issue because the liquid has to be absorbed by the emulsion.  This takes a bit of time, depending upon the temperature.  By soaking in water first, this softens the emulsion and prepares it for the developer.  A water soak will also remove the anti-halation layer from the base of the film.  This layer is added to prevent light from reflecting off the pressure plate and back through the film twice creating a glowing effect on the highlights.   Polypan F film has no anti-halation layer and it will give you this effect intentionally. If you pre-soak your film, this layer will come off and you will see the water is stained when dumped out. I have seen greens, magentas and purples.  This is normal. 

Since most B&W film, processed at 68 degrees will not yield developer times less than 5 minutes, I do not include a water step. Color negative film on the other hand I do.  It certainly will not hurt the film to do it.   Here is the breakdown:


B&W Film (traditional, non-C-41) if the developer time is 5+ minutes:
No.  

If less than 5 minutes, I use a different dilution or lower temperature to increase the time.

C-41 Color Negative Film or C-41 B&W Chromogenic Film:

Yes!  Color Negative Film is processed at about 100 degrees +/-.  The developer step is 3:15.  as in 3 minutes, 15 seconds. That is awfully short.  I include a one minute water soak first, with water at 100 degrees to prepare the emulsion for the developer.  


Sunday, March 23, 2014

The Kiev 60 - Camera Review!

This camera is a tank.  I weighs upwards of 5 pounds and almost requires two hands to carry it.  This camera is one of the few medium format SLR cameras ever made.  The Kiev 60 is a Russian/Ukrainian copy camera similar in style to a Pentax 6x7 although the Kiev 60 shots 6x6 square images  This is old school photography at it's best.  The camera is so large it attracts attention when taken out in public.  It's quite simple to use, with only shutter speed, aperture, stop down preview and film advance.  This model came with a waist level finder and a TTL eye level finder.  I opted not to put batteries in to use the TTL metering and simply use a hand held reflected meter for more accurate readings.  There is no self timer, although there is a tripod mount which really helps take the weight off.

There is a cold shoe, but no hot shoe.  Since the cold shoe simply holds the flash via the flash shoe you must use the PC sync socket on the front of the camera to connect the flash via cord.  Inconvenient yes, but this is an old camera from Russia. The flash sync speed is only 1/30.  This impedes things a bit as using flash outdoors forces you to maximum sync speed of 1/30, unless you are using 100 ASA film, you are not going to have much control over depth of field.  The focus is a bit slow, but that could be related to the fact that at 40 years old and looking through bifocals I have an inherently hard time anyway.  The lens is an 80mm 2.8 and provides beautiful bokeh when shot wide open. The camera makes an audible "clunk" at the shutter firing and often if your subject is human, a comment is made about the quality of the shutter sound.  The film is very easy to load with a red dot on the inside to indicate the start mark alignment on the film paper backing.  The transport is smooth and the roll is tight when removed from the exposed side of the camera. There are no visible light leaks on the film with this particular camera, which is always a concern with cameras of this age. This camera came with the original box and instruction manual all in Russian.

This camera only leaves a small gap between frames, around 1/8 of inch. After the 12th frame, it appears on the film itself [after processing] that there is room for one more frame. I tested this theory on a roll of film (not processed as of this post) by firing another shot off at the K mark on the frame counter which indicates the end has been reached. The camera does fire after the 12th frame so when I process the film I update this post at the bottom to indicate how that test went.

Here is the camera with a remote wireless flash transmitter attached to the cold shoe which is plugged into the X-sync.


Here is a shot taken with the Kiev.  1/30 @ 2.8  on Kodak Tri-X.  Processed in Sprint Standard developer.


This image taken on the Kiev 60. Available light. 1/30 @ 2.8. Processed in C-41 "hobby kit".


Ektar 100 - Expired Test

I tend to acquire a lot of old film.  Color film when expired is particularly fickle.  I shot of roll of Ektar 100 that expired in 2011.  I shot it at 80 ASA and developed it at home in a C-41 Unicolor Kit.  I will do a thorough review and how-to in a future post of developing color negative film at home.  Here is a shot taken with a Canon Elan and minimal color correction after scanning on an Epson V500.  Even with the film expired after nearly 3 years, the images still look great.


Formulary Warm Tone Paper Developer 106 - REVIEW

I found a half liter mix of this obscure paper developer sitting in a box at our local camera shop.  Wanting to do some darkroom printing I thought it would be fun to give it shot.

The paperwork promises warm blacks to an engraving brown on bromide papers.  I had a box of Ilford 5x7 pearl finish that worked nicely.

I mixed the developer per the enclosed instructions.  I have always had great results and found Formulary products easy to use and very consistent.  You can get this developer from Freestyle here.

The developer is dark muddy brown when mixed and smells similar to Caffenol. (more on caffenol in a later post).  The instructions recommend a 1:7 or 1:15 mixing ratio; the latter for greater brown tone. I opted for the 1:15 and the suggested per print developing time is 5-8 minutes.  I ran some tests with a projection print scale as to not waste paper.  The brown tone is quite nice and stains the white base as well.  These are 6x6 negatives shot on Acros 100 and printed on an Omega C700 which is only intended for 35mm, so hence the sloppy border.  I used a #3 polycontrast filter to punch it up a bit as this is a lower contrast developer.


Expired film - what you need to know

There is a lot of old film floating around.  Professionals would stock up on bricks of film to get a discount and stick it in the fridge for later use.  I recently acquired a stack of old film.  All of it 120 format and all of it expired in 1998-2001.

Provia 400 
T400CN
Ektachrome Plus
Fuji 800 NHG II
Portra 800

The challenge with expired film is that it loses "speed" with age and will develop base fog, especially if not refrigerated.  I find film this old needs to be exposed about 3 stops over the box speed.  I am testing a roll of the Fuji 800 that expired in 1999 and I shot it a 100.  The T400CN I will shoot at 50. Once I process the film, I will post the scans to show the quality.  

I friend recently gave me a 100 sheet box of TMAX 100 that expired in 2003. It had been cold stored.  I had just purchased a 1963 crown graphic and needed some film to play with and the TMAX dropped right into my lap.  My first tests were exposed at 50 ASA.  I processed in D-76 (more on developing 4x5 in a later post) with less than enthusiastic results.  The film showed no base fog and the images looked great at 50 ASA considering I didn't like the D-76.  

By contrast, I was also given a 100 foot roll of expired Eastman Double-X 5222 motion picture film.  This is also B&W. It expired in 1964. It came complete with rusted can and all!  I shot a test roll exposing the same image from 64 to 500 ASA with 200 giving the best results processed in D-76. There was significant base fog, more than I cared for. The Epson V500 scanner plowed right through that but the grain was more that I care for as well. However, a free 100 ft roll of film, who's complaining when you shoot for fun.  


Saturday, March 22, 2014

110 Orco B&W Film Review

Out of shear curiosity, I had to purchase a roll of 110 size B&W Orca just to play with.  I used a cheapy Kodak Ektralite 110 camera. The flash didn't work, so it was all outdoor shooting. 

The film is rated at 100 ASA.  I shot a variety of subjects at different distances just to test the fixed focus lens.  I used a Yankee film developing tank, which is one of the only tanks you can find that the reel shrinks down to accommodate 110 film.  Loading it is a pain the rectum, but you can with perseverance. 

I used D-76 1:1 and found the time on the massive development chart

I also purchased the 110 film holder from Lomography for $24.99 just to have on hand. My family shot lots of 110 film when I was younger so I figured the investment would pay off. 

Here is a scan of one of the strips of cut film.  Definitely worth playing with if you have the means.


How I got Here

I have been taking pictures for 25 years.  

In these 25 years, there isn't much I haven't seen. I was fortunate to pick up the camera at age 15, around 1989, when digital wasn't even thought about for the amateur market.  It would take another 10 years before the first consumer digital SLR would hit the market starting the trend that would be the eventual decline of film usage.  I learned more about photography because of film. I was in the industry as a professional photographer and professional photofinisher from 1993 until 2007.  I was there when digital capture, scanning and digital printing was in its infancy.  

I cannot imagine a world without film.  My first camera was a plastic 110 keychain camera.  I graduated to a Minolta 35mm dual lens automatic point and shoot.  I used that for a few months before I hit the big time, or at least the big time according to a 16 year old.  I had signed up to be on the high school newspaper staff as a photographer my senior year in high school.  The previous semester, I took photography as a science elective my junior year.  It was the only class other than Band, that I "aced." I was hooked.  As a congratulatory gift, I was given a Pentax K1000 kit by my parents.  I would use that camera for next three years.  I still have it, too!  

Over the years, I have shot with 110, 35mm, APS, Bronica's, Mamiya's, Yashica's and recently, a Crown Graphic.  It only took 25 years before I shot my first 4x5 sheet.  My specialty in the photo lab was color negative printing. I learned color from a few lab folks that worked with in the early days.

By the time I left the photofinishing industry in 2007, I had clocked about 17 years developing, printing and scanning film.  I have used just about every commercial color negative film manufactured since 1990.  

I switched to digital in 2003 with the purchase of a Canon 10D.  As digital SLR technology was starting to gain momentum, that technology also came with a huge learning curve.  I was determined to learn everything I could about digital and eventually pushed film to the back burner.  I was the local "expert" in digital capture, editing and printing during my tenure while working in photofinishing. New film emulsions were slow to emerge as the shooting public and especially professionals eliminated film to save money.  

About three years ago I put away the digital camera and went back to film exclusively. I no longer shoot for profit and photography does not provide income. I shoot for fun now, trying to ever improve and learn new skills.  Film today is as good as it has ever been.  It is a race against time to try out new and rare emulsions before film eventually disappears.  The demand is still high but I don't know how long that demand will sustain.  

In this blog I want share some of the nuggets about film that I have learned in the last 25 years. Everyday I still learn something new.  The topics will be random and may be more information than anyone cares to read.